
 فارسی
فارسی Français
 ps
ps Russian
PiGuard is a device that integrates the WireGuard VPN technology with cheap and easy to find Raspberry Pi servers. When a VPN server is blocked, WireGuard automatically and transparently connects to another server making PiGuards a censorship circumvention tool easy to use and difficult to block.
PiGuard, the hardware VPN
Hardware
Indicative price of the set of elements: 112 €
- Raspberry Pi 4 board: 80 €
- Case for Raspberry Pi 4: 10 €
- 32GB micro SD card: 10 €
- Power supply for Raspberry Pi 4: 10 €
- Ethernet cable (RJ45): 2 €
Specifications
The use of a VPN, whether it is PiGuard or any other technical solution solution does not secure your network, a VPN is a dumb pipe that secures and carries your data, whether you are downloading a legitimate document or a virus. If one of your computers is compromised, the data will leak through the VPN. It is necessary to understand what a VPN does and does not that’s why a training course is included in the project. the project.
The PiGuard needs a constant Internet connection via an Ethernet cable and a secure power source.
Deployment
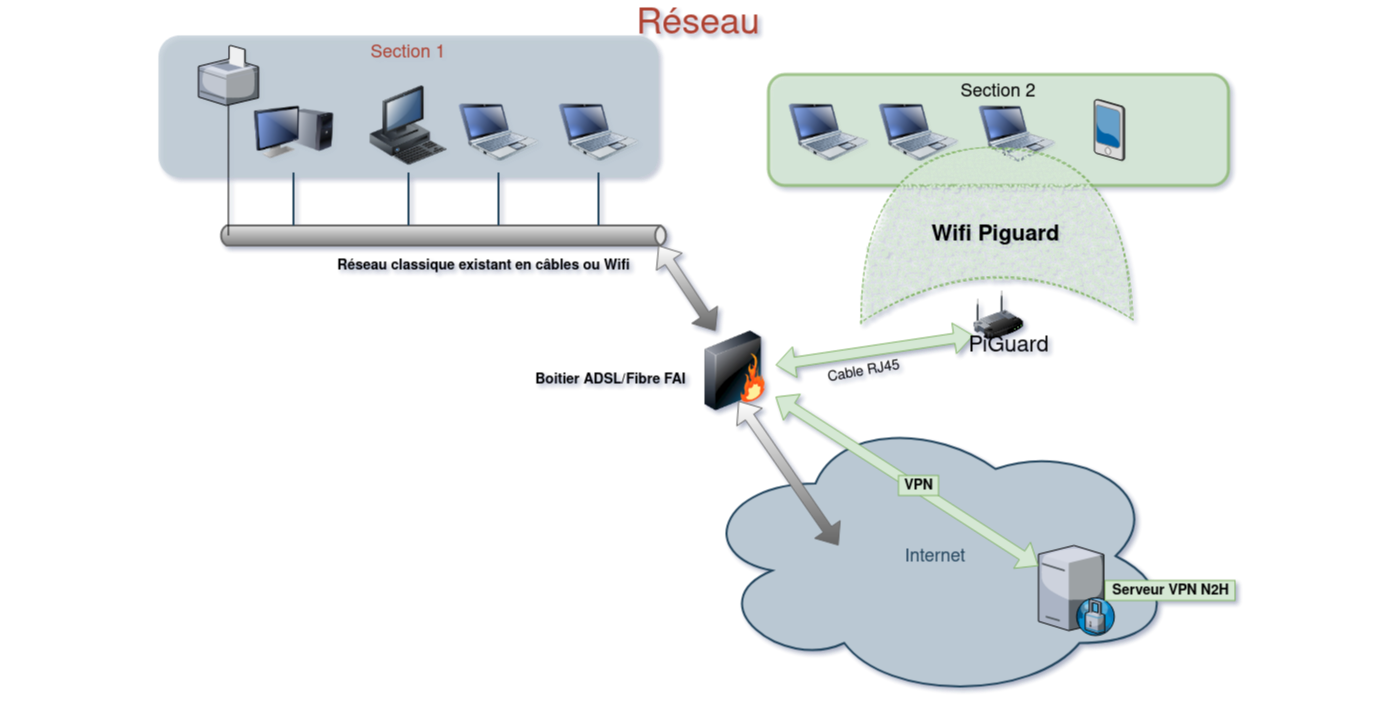
There are several possible scenarios: do you want to protect do you want to protect all the devices in your editorial office or only some of them? This will where and how the PiGuard will be connected.
Simple network
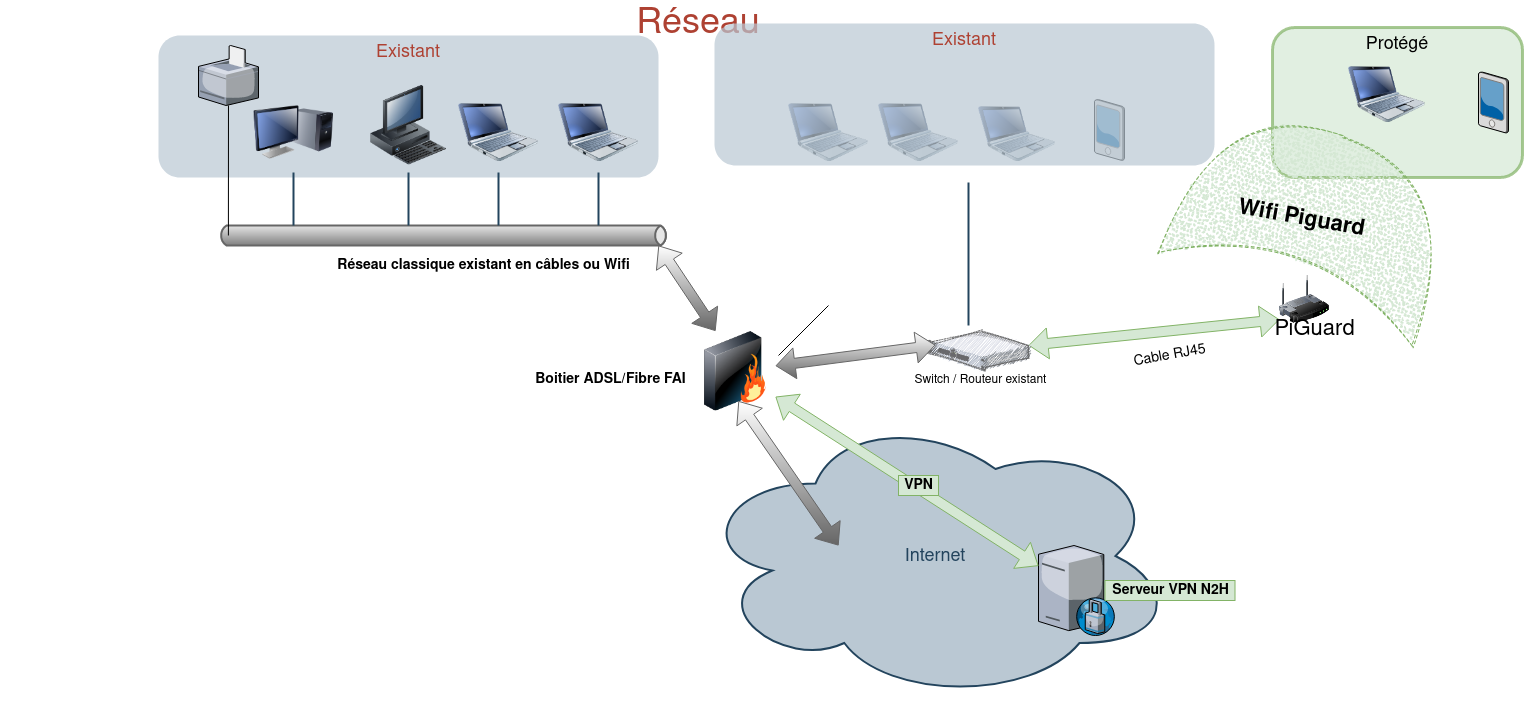
Complex network
PiGuard installation
You will need:
- A computer running Windows 10 or Mac OsX
- equipped with an SD card reader
- The software Imager from the Raspberry pi foundation which allows to install the PiGuard system on the micro SD card
Step 1 : download and check the image
Download the PiGuard N2H system. Once the download is done, we invite you to perform a control operation on it. To do so, on Windows, install Quick HASH. Once launched, check SHA256 in the left column, go to the File tab and get the image file.
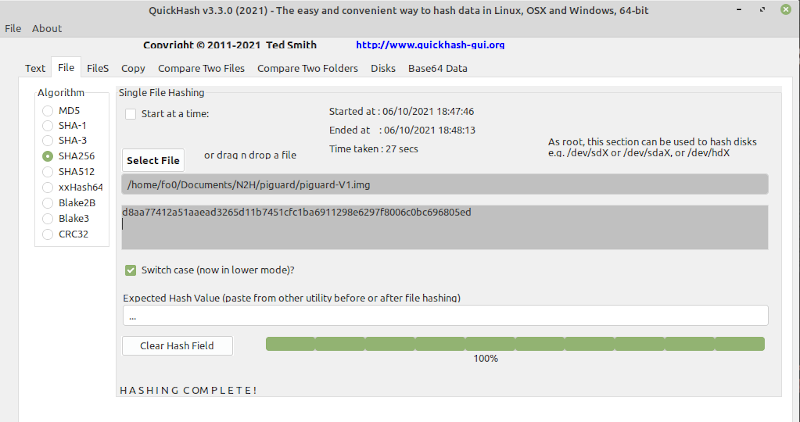
The number that will appear should be this SHA256:d8aa77412a51aaead3265d11b7451cfc1ba6911298e6297f8006c0bc696805ed to the nearest number. This ensures the integrity of the file, i.e. nothing has been maliciously modified.
Step 2: Installation of the image
Install the Imager software on your Windows computer.
Insert the SD card into the drive of your computer and start the Imager software
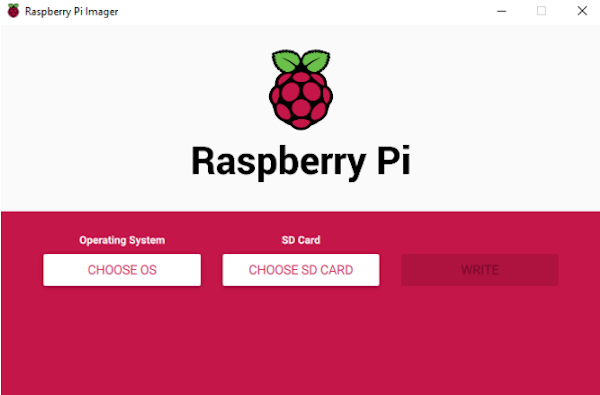
Select Choose OS and scroll down to the Use Custom menu (the last one down). In the menu that appears, go find the file piguard.img that you downloaded to your computer.
After selecting Choose SdCard, you should see your SD card appear. Validate.
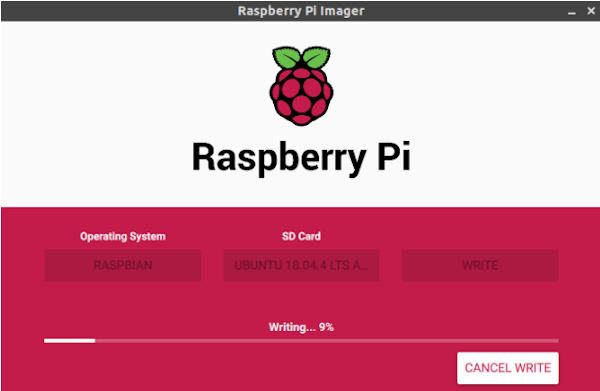
Click on Write and wait for the operation to finish:
Once this is done, in your file explorer, navigate to your SD card and open the /etc/wireguard directory. In this directory, you will drop the configuration file provided by Nothing2Hide.
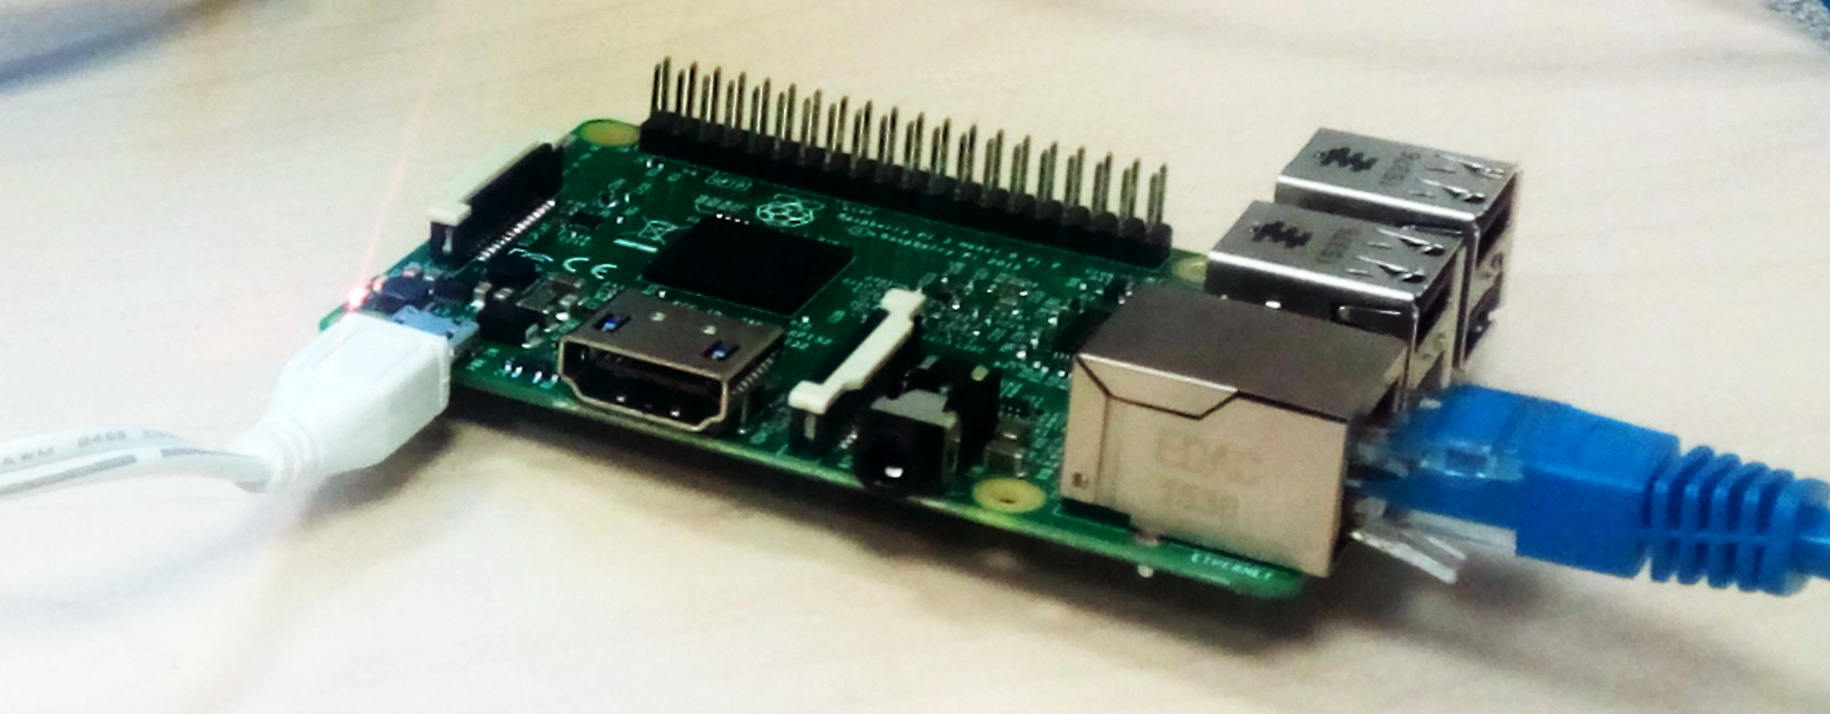
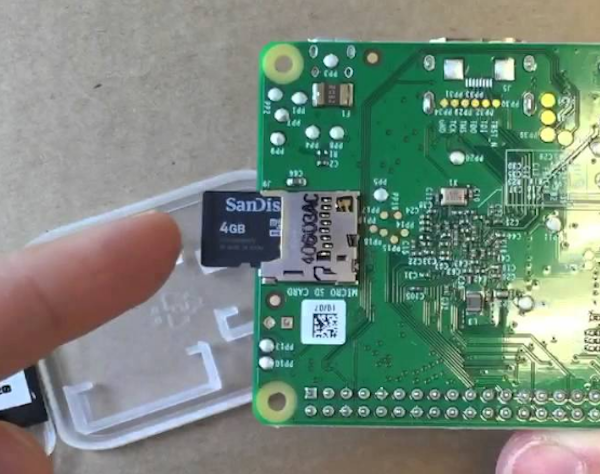
Step 3: Insert the card
Insert the SD card in the slot on the back of the raspberry Pi as shown in the image below:
Step 4: Connecting the Raspberry Pi
- Connect the Ethernet cable to your ASL/Fiber Modem
- Plug your Raspberry Pi into the power supply
- Wait for the red LED to stop flashing. A new Wifi network called Piguard will become available
All you have to do is to set up your devices to connect to the Piguard WiFi network with the password provided by us.
To test your PiGuard is up and running properly, at the first startup, visit the website https://whatismyip.com and check that your IP address is now located in France (if you are using Nothing2Hide WireGuard infrastructure).
Troubleshooting
In case of problems, you can ask for assistance by writing to us at piguard@nothing2hide.org. However, before requesting this address, here are the first step you can take:
- Check that your Internet box (provider) is working and that the Internet connection is stable from a device directly connected to it
- Check that the Ethernet cable from the Raspberry pi has not been unplugged
- Check the electrical connection, the red LED on the Raspberry pi should be lit
- Remove the SD card from its slot, put it back in and reboot
- Unplug and plug again the Raspberry pi, wait 5 minutes. If you do not see the Piguard Wifi network, you can contact the project manager in your country.
Note
By using a PiGuard box, you are using the WireGuard infrastructure provided by Nothing2Hide to protect yourself and access information in a secure and uncensored way. You must respect the use of this network and avoid to download illegal content that could jeopardize the project (DMCA, SACEM, Copyright, etc.). We do not monitor the use of the network. However, we do measure the volume of bandwidth usage.